Extending Existing Android Applications - Part Two
In the last post I explained how to pull an Android APK apart and get it set up in Eclipse and ready for development. In this post I'll explain how we can modify the app, making both simple modifications as well as actually changing the code to add a new activity.


Right click on the project name on the left, select New -> Other

 Click 'Next'
 Finally, click 'Finish'.
Open the AndroidManifest.xml in text mode and move the new activity up so that it's the first activity.

Click 'Play' to start the code in the emulator. This new activity should start instead of the original.

<action android:name="android.intent.action.MAIN" />


public void onCreate(Bundle paramBundle)
{
super.onCreate(paramBundle);
setContentView(2130903042);
GasMileage.create(this);
getResources();
TabHost localTabHost = getTabHost();
Intent localIntent1 = new Intent().setClass(this, SummaryActivity.class);
localTabHost.addTab(localTabHost.newTabSpec("Summary").setIndicator("Summary", null).setContent(localIntent1));
Intent localIntent2 = new Intent().setClass(this, FillUpActivity.class);
localTabHost.addTab(localTabHost.newTabSpec("fillup").setIndicator("Fill Up", null).setContent(localIntent2));
Intent localIntent3 = new Intent().setClass(this, HistoryActivity.class);
localTabHost.addTab(localTabHost.newTabSpec("history").setIndicator("History", null).setContent(localIntent3));
localTabHost.setCurrentTab(0);
}


Prerequisites:
Modify Images:
This is a very simple tweak, but a good starting place. When apktool took the APK apart it extracted all the images as well and stuck them in Eclipse. They're found under res/drawable-*. You can modify or replace them as you see fit, just change the file.Modify Strings:
Somewhat more interesting is modifying the strings that are displayed or used. This could be useful if, for example, you wanted to direct an application to a different URL than one it was originally programmed to contact. Almost all of the strings in the code should be located in res/values/strings.xml. Double click the strings.xml file to bring it up in the editor. There you can see the values for various strings and change them to whatever you'd like.
Adding a new activity:
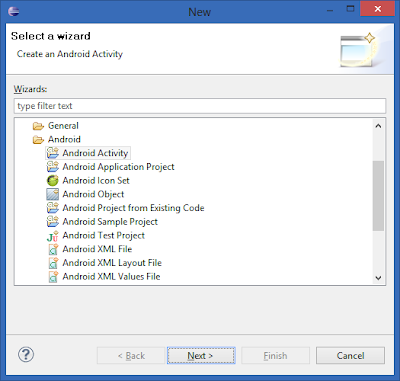
At this point we can add a new activity to the project and replace the project's main activity with our own.Right click on the project name on the left, select New -> Other

Choose 'Android Activity'


Open the AndroidManifest.xml in text mode and move the new activity up so that it's the first activity.

Click 'Play' to start the code in the emulator. This new activity should start instead of the original.

Reversing the original activity:
Of course, it isn't very fun to just replace the activity. Really we want to integrate the new activity with the original application. To do that we first have to reverse the original activity.
First, we want to know what the original main activity was. Look in AndroidManifest.xml and find the original activity (don't be confused by the one you just added) with the intent-filter
<action android:name="android.intent.action.MAIN" />
Note the 'android:name' of the activity. That's the name of the first activity that gets started by Android. Here it's 'GasMileageApp'. We need to find and reverse it if we want to add our own stuff.
We'll use JDGui to do the actual reversing. JDGui is the Java Decompiler (there's also an Eclipse plugin, but it's not as easy to set up).
Start JDGui and open the jar file that dex2jar created.
Find the original activity on the left and open it up.

This is the (reversed) code for the original app as it sits in the jar file that's being used to run the program.
You'll notice that some things are a little arcane (like the 213090342 number used in setContentView). That's because Android uses a lot of numeric constants for things and JDGui just sees it as a number and can't necessarily resolve it back to the thing it actually refers to. That's OK though, it should still work for us, but it may make it harder to figure out exactly what's going on.
Now we need to figure out how to modify this.
Create your own version:
To create our own version we'll actually create a new class with this exact name (and Java namespace) in Eclipse and then we'll cut and paste the code from JDGui in to that file.

If we compiled and ran this now, we'd run in to a problem; we'd have two copies of GasMileageApp.class. One is from the dex2jar'd jar file we created the other is the one that Eclipse compiled from this source code. So, we need to get rid of the one from the dex2jar file.
To do that, open the dex2jar'd jar file in 7zip (or your favorite zip utility) and delete na/hennen/gasmileage/GasMileageApp.class.

Now that it's been deleted, go back to AndroidManifest.xml in text mode and move the activity you added before (the default name is MainActivity) back to the bottom where it started. This will let GasMileageApp be the first activity that starts, which is exactly what we want.
Everything should be in working order now. Run the program again just to make sure. You should see the original GasMileageApp screen and not the new activity.
Add your activity to the tabs at the top:
So, we still don't have our own activity in there doing anything. To do that we need to understand how GasMileageApp is doing it.
The important part is the onCreate() function.
public void onCreate(Bundle paramBundle)
{
super.onCreate(paramBundle);
setContentView(2130903042);
GasMileage.create(this);
getResources();
TabHost localTabHost = getTabHost();
Intent localIntent1 = new Intent().setClass(this, SummaryActivity.class);
localTabHost.addTab(localTabHost.newTabSpec("Summary").setIndicator("Summary", null).setContent(localIntent1));
Intent localIntent2 = new Intent().setClass(this, FillUpActivity.class);
localTabHost.addTab(localTabHost.newTabSpec("fillup").setIndicator("Fill Up", null).setContent(localIntent2));
Intent localIntent3 = new Intent().setClass(this, HistoryActivity.class);
localTabHost.addTab(localTabHost.newTabSpec("history").setIndicator("History", null).setContent(localIntent3));
localTabHost.setCurrentTab(0);
}
Here we can see that it's adding the 'Summary', 'Fill Up' and 'History' activities by creating new TabSpecs. We can just copy one of these lines and update it to add our own activity.
So, add the following after the last call to addTab.
Intent localIntent4 = new Intent().setClass(this, MainActivity.class);
localTabHost.addTab(localTabHost
.newTabSpec("hello")
.setIndicator("Hello World", null)
.setContent(localIntent4));
localTabHost.addTab(localTabHost
.newTabSpec("hello")
.setIndicator("Hello World", null)
.setContent(localIntent4));
That's all we need to do. Run the application and click on the new 'Hello World' tab.
Before:

After:


Wrapping up:
Now that we have our own activity integrated with the rest of the application we can just write Java code to make any changes we want. If you need to change an existing class you've seen how to do that using JDGui to get the original code and how you can then put that code in Eclipse and modify it as needed.
The benefit of this method (as opposed to modifying the Smali files) is that you get to make your changes in Java and in the normal Android development environment. That means you can make more than just minor tweaks. You can add entirely new activities with new user interfaces.
Have fun...

